Tutorials
Creating Authorized Menu
Implementing authorized menus in your Laravolt application ensures that users can only see and access menu items they have permission for. This creates a cleaner user interface and enhances your application's security.
Overview
Menu authorization in Laravolt involves three key components:
- Defining permissions
- Connecting menus to permissions
- Implementing access control checks in your code
By following this approach, you can create a dynamic permission system where administrators can manage access control without requiring code changes.
Basic Implementation
1. Defining Permissions
First, create an enum class to store your application's permissions:
<?php

namespace App\Enums;

use BenSampo\Enum\Enum;

final class Permission extends Enum
{
    const DASHBOARD_VIEW = 'dashboard.view';
    // Add other permissions as needed
}
After defining the permissions, synchronize them with the database:
php artisan laravolt:sync-permissionThis command registers all defined permissions in your database, making them available for assignment to roles.
2. Connecting Menus and Permissions
Edit your menu configuration to specify required permissions:
// config/laravolt/menu/app.php
return [
    'App' => [
        'menu' => [
            'Dashboard' => [
                'route' => ['dashboard'],
                'active' => 'dashboard/*',
                'icon'  => 'chart-bar',
                'permissions' => [\App\Enums\Permission::DASHBOARD_VIEW],
            ],
        ],
    ],
];
This configuration will hide the Dashboard menu from users who don't have the dashboard.view permission.
3. Implementing Access Control in Code
While permission-based menu visibility prevents users from seeing unauthorized menu items, you must also implement access control checks in your code to prevent direct URL access.
Route-level Authorization:
// routes/web.php
Route::get('dashboard', function () {
    // show dashboard
})->can(\App\Enums\Permission::DASHBOARD_VIEW);
Controller-level Authorization:
public function index()
{
    $this->authorize(\App\Enums\Permission::DASHBOARD_VIEW);

    // if authorized, show dashboard
    return view('dashboard');
}
Role Management
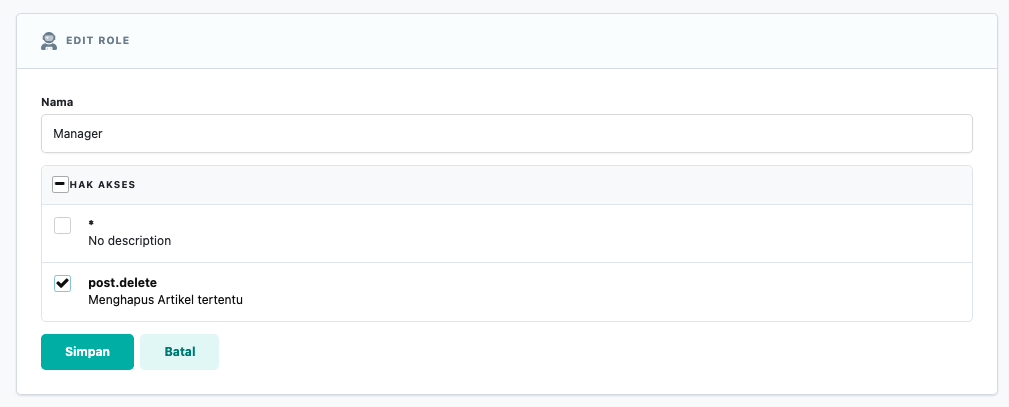
After defining permissions, administrators can assign them to roles through the administrative interface:
- Navigate to "System -> Roles" in the Laravolt admin panel
- Select a role you want to modify
- Check the permissions that should be granted to this role
- Save the changes
Best Practices
Use Descriptive Permission Names: Create permission names that clearly describe the action and resource, like
users.createorreports.view.Group Related Permissions: Organize permissions by feature or module for easier management.
Implement Defense in Depth: Don't rely solely on menu visibility for security. Always implement proper authorization checks in controllers and routes.
Audit Access Regularly: Periodically review role permissions to ensure they align with current business requirements.
Troubleshooting
Common Issues
Permissions Not Showing Up: Make sure you've run
php artisan laravolt:sync-permissionafter defining new permissions.Menu Still Visible Despite Permissions: Check that the permission name in your config matches exactly with what's defined in your Enum class.
Authorization Always Fails: Verify that you've assigned the permission to the user's role and that the user is properly authenticated.
Related Features
- ACL System - Learn more about Laravolt's Access Control List system
- User Management - Managing users in your application
- Role Management - Working with user roles